SAML2 WITH SPRING AND WSO2 IS
Today we going to use a Spring Boot + WSO2 IS + SAML2 to make a simple test of the authentication, we should remember that WSO2 IS can store users and roles, can implement self-registration and many others useful functions, that we will review in other post.
To start you can read two articles that we use to create this proof:
http://www.techsams.com/java/spring/sso/onelogin/single-sign-on-with-spring-saml.html
In this, you can see how to start a spring boot project with SAML2 but using onelogin service.
https://docs.wso2.com/display/IS510/Configuring+Single+Sign-On
In this other, you can see an example of use of WSO2 IS and Single Sign On (SSO) with SAML2.
You can get all de resources from git in this link : <GIT CODE>
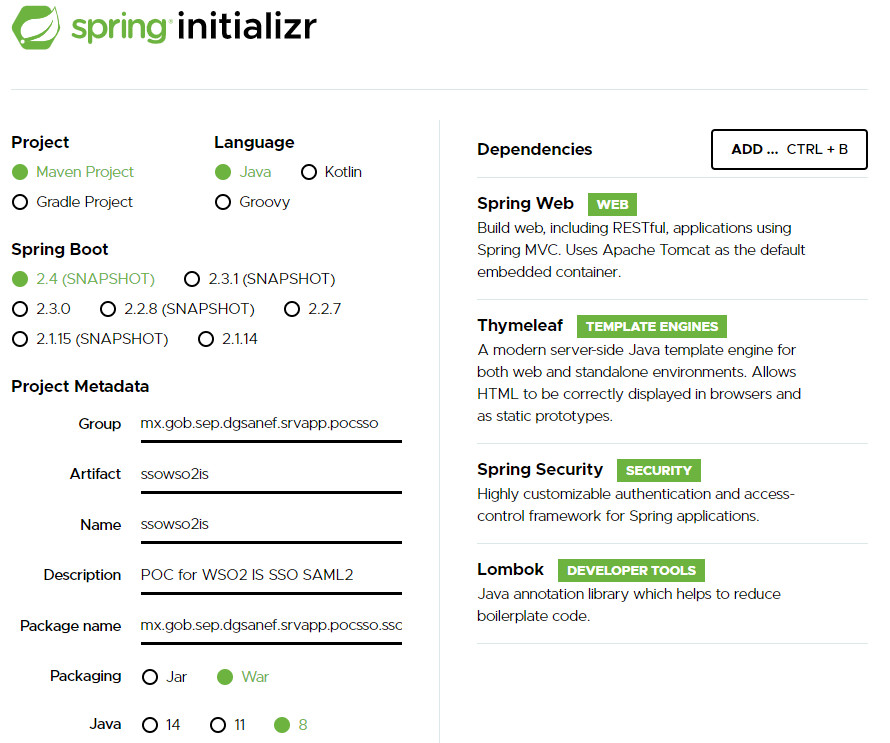
To start the project we going to use Spring Initializr with the following parameters:
- Version of Spring Boot : 2.2.4
- Dependencies: Spring Web, Thymeleaf, Spring Security and Lombok

We download the project and import to our IDE (eclipse in my case).
Then we should add two dependencies spring-security-saml2-core and spring-security-saml-dsl-core.
We should get a pom like this:
https://github.com/Mencrypto/SSOWSO2ISSPRING/blob/master/pom.xml
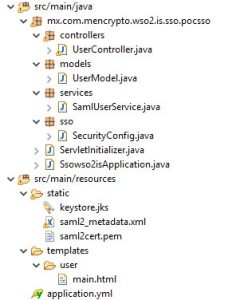
After that, we going to create a structure like this and we going to explain what is each file:

Then the main part of the project is the SecurityConfig class that set default configurations of security based in the spring-security-saml-dsl-core using in the method saml(), all the explanation about the others parameters you can see in the first link posted.
protected void configure(final HttpSecurity http) throws Exception {
    //@formatter:off
    http
      .csrf().and()
      .authorizeRequests()
        .antMatchers("/saml/**").permitAll()
        .anyRequest().authenticated()
        .and()
      .apply(saml())
      	.userDetailsService(samlUserService)
        .serviceProvider()
          .protocol(spProtocol)
          .hostname(spHost)
          .basePath(spBashPath)
          .keyStore()
            .storeFilePath(keyStoreFile)
            .keyPassword(keyStorePassword)
            .keyname(keyStoreAlias)
          .and()
        .and()
        .identityProvider()
          .metadataFilePath(metadataPath)
        .and()
    .and();
    //@formatter:on
  }
In the parameter userDetailsService we set a service, this will be called when a valid authentication is performed, this will return a Model (user) and inserted in the ExpiringUsernameAuthenticationToken object that is sent to the controller, then all work is for thymeleaf and the resource html that you can find in templates folder.
After set the code we should create a jks and export to the path “src\main\resources\static\”; the cert is a file that we use in the next steps, all the passwords for the following commands are secret:
$ keytool -genkey -keyalg RSA -alias saml2cert -keystore keystore.jks
-storepass secret -validity 365 -keysize 2048
$ keytool -export -keystore keystore.jks -alias saml2cert -file saml2.cer
Also we need to set variables in the applcation.yml for set configuration in the SecurityConfig:
saml2:
  metadata-path: classpath:static/saml2_metadata.xml
  sp:
    protocol: http
    host: localhost:8080
    path: /
    key-store:
      file: classpath:static/keystore.jks
      alias: saml2cert
      password: secret
Then we need create a Service Provider in WSO2 IS, for this proof I use IS 5.9.0
The data that we need to use are:
Service Provider Name: Just the name example: “SpringSAML2”
Application Certificate: We should load the saml2cert.pem that we created in the previous step (in the static folder).

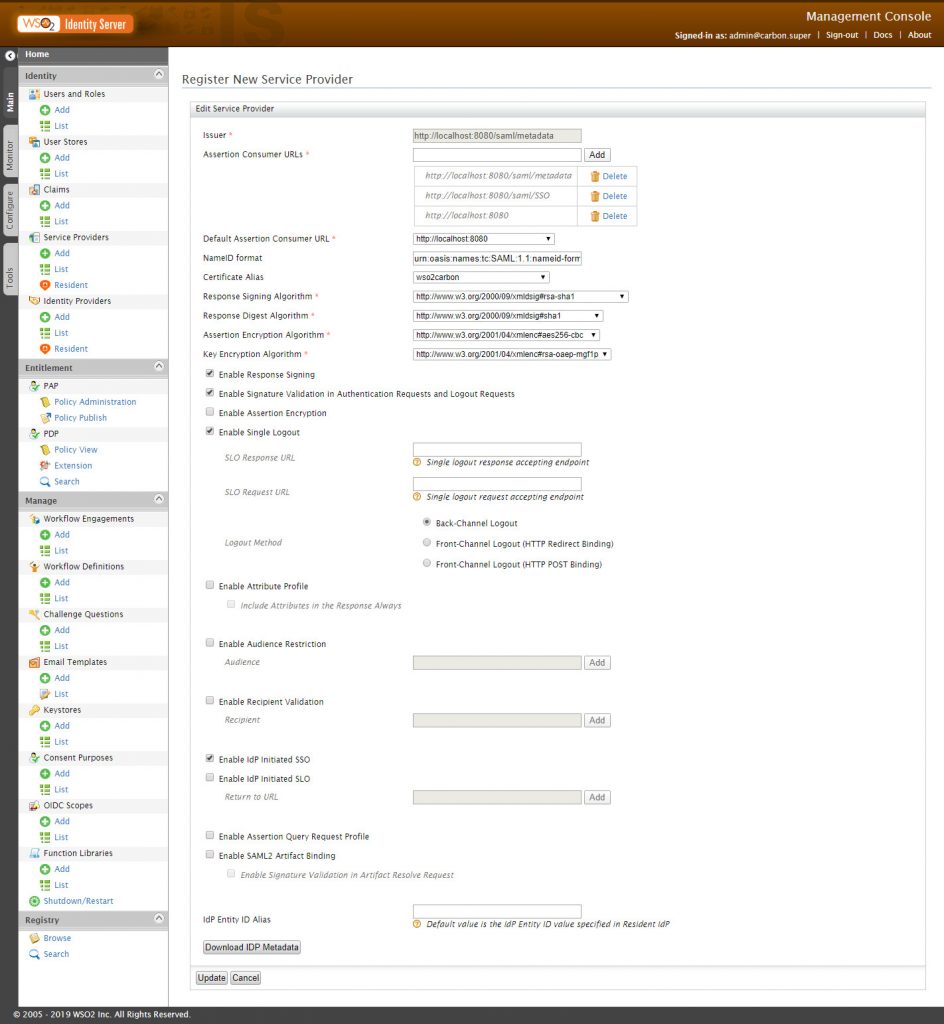
Then we select Inbound Authentication Configuration and select SAML2 WebSSO Configuration, and make a new configuration like these in Manual Configuration:
Issuer: URL of the app, in this case http://localhost:8080/saml/metadata
Assertion Consumer URLS: URL to which the browser should be redirected after the authentication is successful in this case http://localhost:8080
In addition, select the next options:
- Enable Response Signing (Sign the SAMLResponse)
- Enable Signature Validation in Authentication Requests and Logout Requests (With the cert validate the SAML2 Request)
- Enable Single Logout for SSO purposes
- Enable IdP Initiated SSO, with this is not necessary that the service provider begin the flow
Then we push Download IDP Metadata and paste in our project “src\main\resources\static” path and finaly push Register.

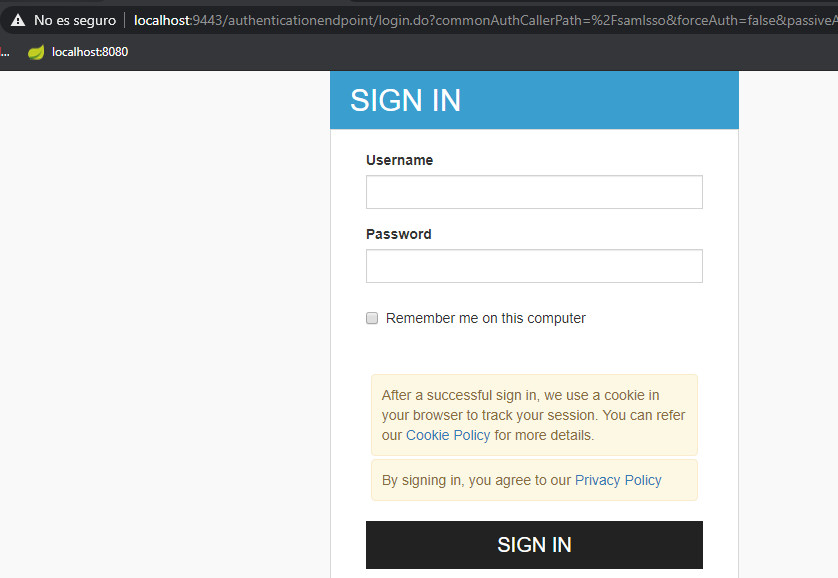
And that´s all, we start the Spring Boot project and call URL: http://localhost:8080 and we going to be 302 redirected to something like: https://localhost:9443/authenticationendpoint/login.do?commonAuthCallerPath=%2Fsamlsso&forceAuth=false&passiveAuth=false&tenantDomain=carbon.super&sessionDataKey=613f632d-2b60-4530-a859-59c9f9ba1352&relyingParty=http%3A%2F%2Flocalhost%3A8080%2Fsaml%2Fmetadata&type=samlsso&sp=SpringSAML2&isSaaSApp=false&authenticators=BasicAuthenticator%3ALOCAL

